
After Learning Typescript, I decided to document the knowledge I just absorbed?. I built a quick online chat project to use it. In this blog, I’m going to focus on how I used Typescript in Redux and ensured it works after being compiled.
The first line of the packages is the default redux installation which I have mentioned here. The second line of the installed packages contains the type definition of its corresponding one in the first line( We have to install it in order for Typescript to run on redux ).
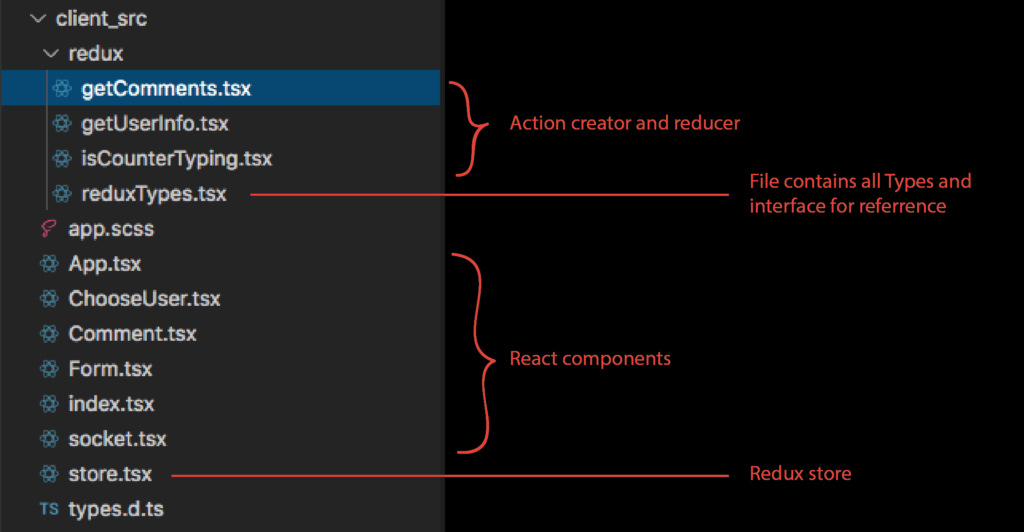
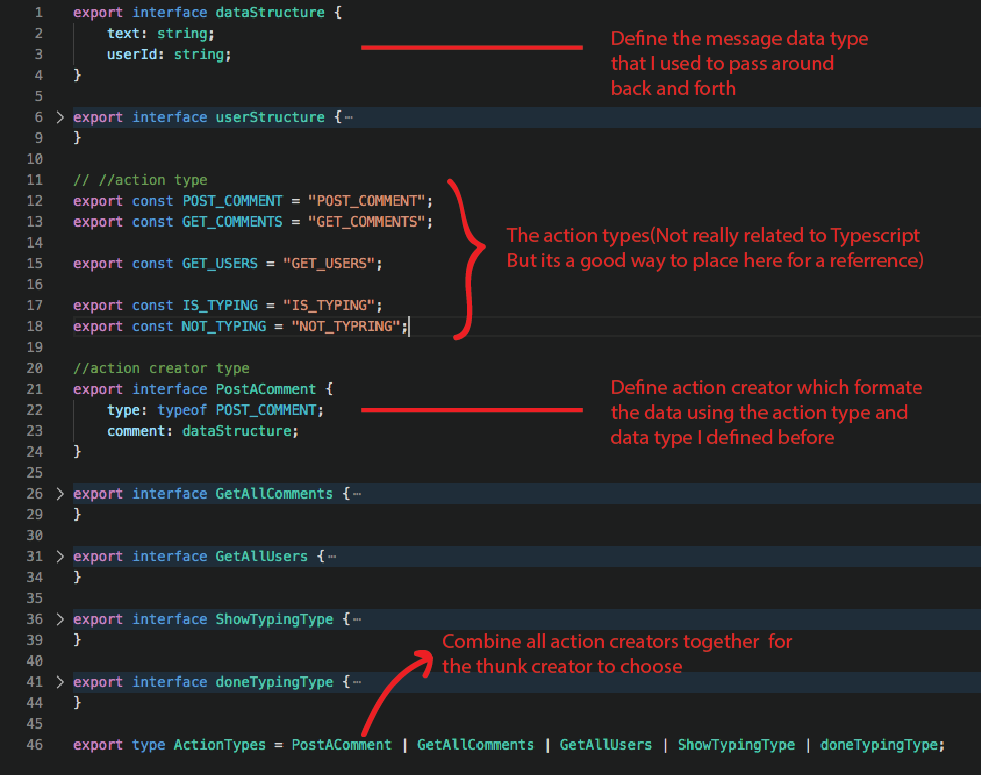
Here is the structure of my chat app. I saved my Types and interfaces into a single file called ‘reduxTypes.tsx’ for other files within the redux folder to reference. The screenshot below displays how I defined my types and interface in the ‘reduxTypes.tsx’ file.
The data type control from Typescript gives the Javascript code more restrictions which really prevents unnecessary bugs ( You know what types of data will be passed in and what kinds of data will be returned from a function ).
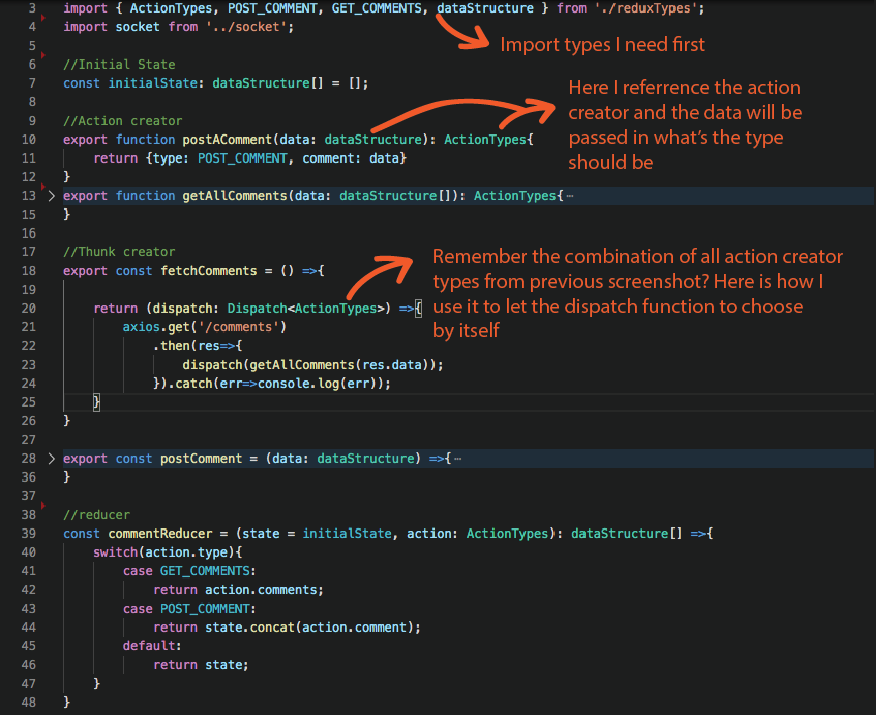
After finishing all the type settings in the previous file. Now we can start to use it. Here I have a screenshot from one of my redux files called ‘getComments.tsx’ which will eventually fetch and update any data with its changes to the store.
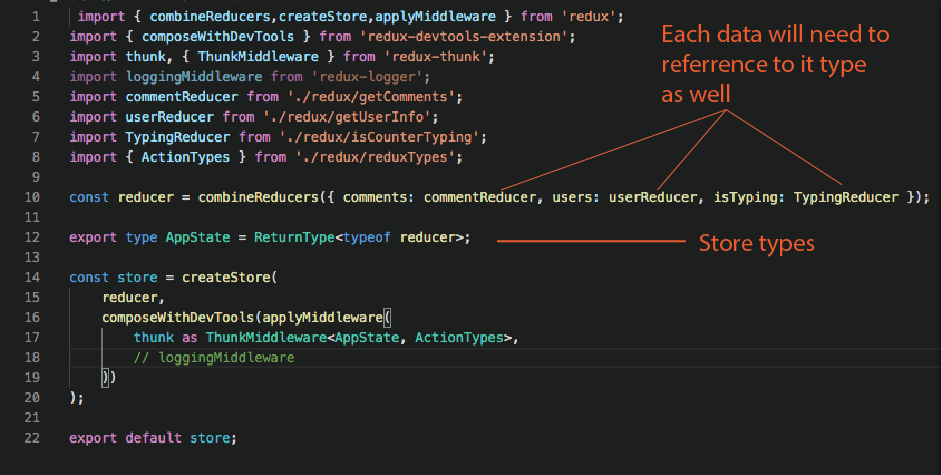
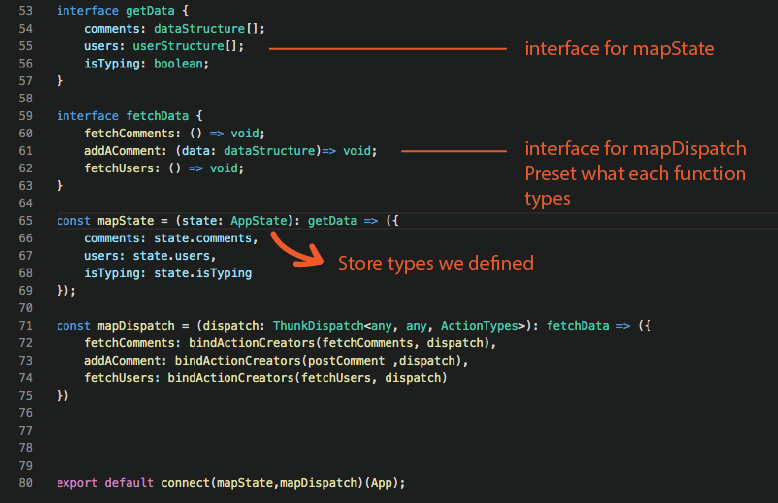
All the redux core files have been set. I can finally make the call and use my stored data. In the screenshot below, I defined two interfaces for my ‘mapState’ and ‘mapDispatch’ functions which indicate the data type inside of them.
In conclusion, I think the takeaway from this implementation is:
(1). In Typescript, we need to define the data type before we use it.
(2). Because of the preset data types & interfaces, Typescript makes Javascript code more secure and has fewer bugs.
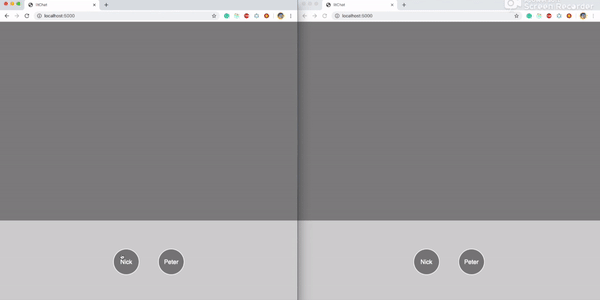
Here is the Demo of my ‘LitChat’, You can check the code Here